Peña Blanca (2,536m), Peña Parda (2,661m) and Peña Telera (2,762m) from Lacuniacha.

Pyrenees and mountains 📩
Here 🔥A circular route, rather in the shape of an eight, which visits several of the most important peaks in the eastern sector of the Sierra de Partacua: Peña Blanca de Abajo (2,319m), Peña Blanca Alta (2,536m), Peña Parda (2,649m) and Peña Telera (2,762m). The ascent to Peña Blanca de Abajo is via the Canal del Burro, while the descent follows the normal route to Peña Telera via the famous horizontal traverse and the Cobachirizas channel.
Of course, this is a route away from the crowds and could well be divided into two separate excursions. The ascent to Peña Blanca on the one hand, and the ascent to Peña Parda and Telera on the other.
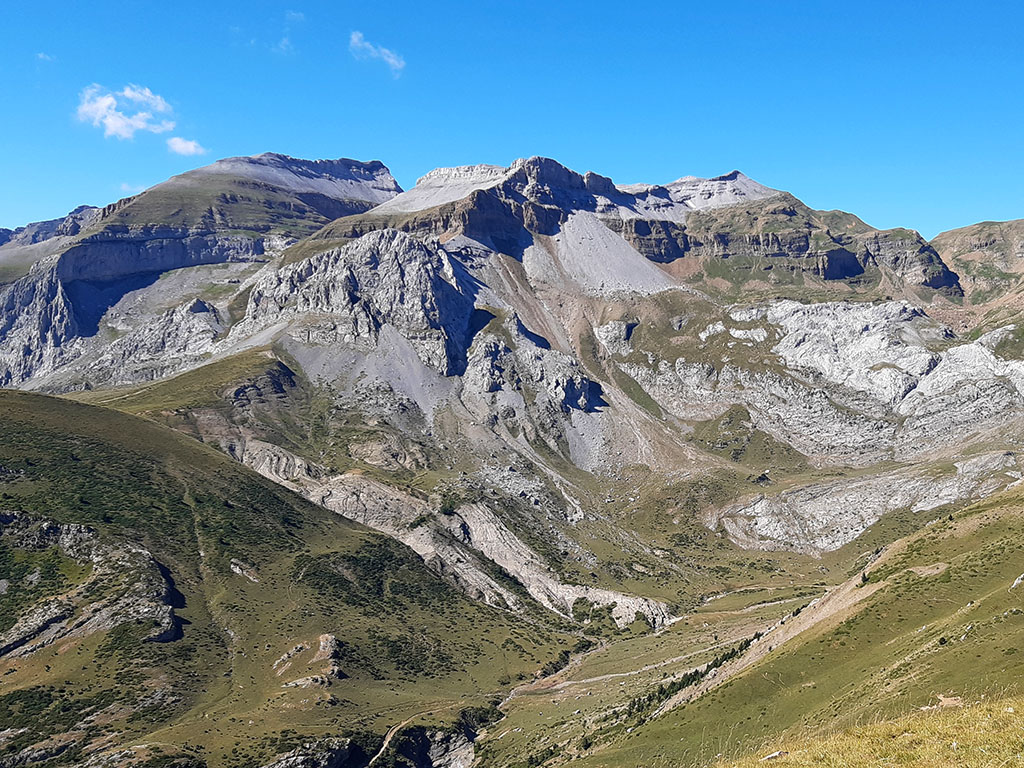
Peña Telera and the western sector of Partacua.
Peña Telera is undoubtedly the most visible face of the Sierra de Partacua. A huge tusk that plunges 1,000 metres above the Ibón de Piedrafita and dominates the Tena valley to the west and the peaceful pastures of the Lana Mayor valley to the north.
However, if we want to visit the highest point of the sierra, we will have to go a little further in search of Peña Retona.
The lower part of Peña Telera is an ideal place for family excursions, visits to the Ibón de Piedrafita, the geotectonic arch, cycling routes or enjoying the mountain meadows under the massive presence of the Corona del Mallo, Peña Blanca or the aforementioned Peña Telera.
Winter is the time of greatest splendour of these walls, when the walls are covered with ice and the snow-covered corridors offer some of the most interesting winter routes in the whole massif. The most famous is the Gran Diagonal (AD-AD+), but up to Rinconada de Arbenuso, the Sierra de Partacua offers a 7-kilometre-long wall with an infinite number of routes for climbing and extreme skiing.
*Clarification: regarding the name of some summits that in the maps based on OSM or TOPO PIRINEOS appear as Corona del Mallo (not in those of the IGN and others), we have taken as good the information published in the blog of the Komando Kroketa on the recommendation of Bucuesa. Two blogs that I'm sure you already know and that always provide very reliable information. Apart from this, in the face of the dance of names, someone has taken the trouble to climb up to these peaks to leave the name written on a stone on the main summits.
SUMMARY:
From the car park of the Lacuniacha wildlife park we head towards the arch of Piedrafita to continue our ascent via the Canal del Burro. After crowning Peña Blanca de Abajo / Punta Queba and Peña Blanca Alta, we carefully descend to the pass of Covachirizas, where if we have had enough we can start our retreat. Otherwise, the route continues round the cliffs of Peña Parda to the southwest to climb straight ahead to the first opportunity. From the summit of Peña Parda we continue along the southern slope to Peña Telera, the culminating point of this excursion. The descent is by the normal route, along the famous exposed traverse that ends at the Covachirizas pass. The descent of the channel to the Ibón de Piedrafita lake is obvious, where we will join the track that leads to the start of the route shortly afterwards.
MAP:
DOWNLOADABLE:
> Download Track
HOW TO GET THERE:
See in Google Maps.
Taking the town of Sabiñanigo as a reference point, we head along the N-260a and then the A-136 towards the Tena Valley (Biescas, Sallent de Gállego, Panticosa, Formigal...). At kilometre 8 and a half of the A-136, some signs indicate the turn-off to Piderafita de Jaca and the Lacuniacha Fauna Park, where we head to begin this route. It is a total of 28kms from Sabiñanigo. If we get there early, we can leave the car in one of the parking spaces next to the road, later, from 8:30 to 19:30, we can park in the park's car parks for 5€.
Technical specifications:
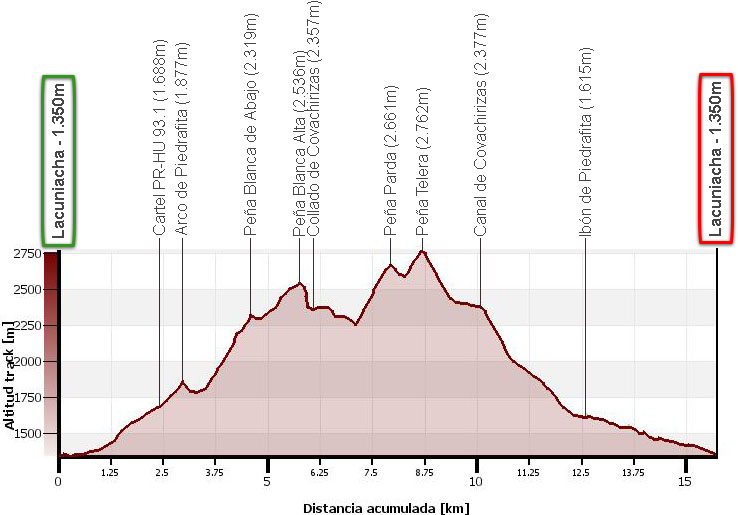
Distance: 15,7kms.
Cumulative difference in altitude: 2.030m.
Timetable: 9-11 hours. Running time non-stop: 8h25min.
Water: There are no springs along the entire route. At the time of the route, the only stream we find with water is the one that descends from the Piedrafita lake. We recommend that you carry plenty of water, at least two litres.
Difficulty: Difficult route due to the slope but above all due to the type of terrain. Between the arch of Piedrafita and Peña Parda, we will move largely off the path. Sometimes on rough terrain, such as the descent of Peña Blanca, which will require us to be able to find the steps to descend on a terrain without milestones; or on unstable rocks, such as the exhausting ascent to Peña Parda. The descent of Peña Telera is not without its difficulties either. After a short rocky descent (I), there is a long traverse over the avismo which, although in summer it is not very impressive and there is a path at all times, a fall down the steep slope could be impossible to stop. A very accessible area in good conditions but very exposed in snow or ice.
Recommended equipment for the summer: boots rather than slippers, walking sticks, GPS recommended, etc.
ITINERARY:
(0h00min; 0,0kms) Parking of Lacuniacha (1.350m). Start walking along a track that leaves a large agricultural building on the left. The track is marked with yellow and white signs to the Piedrafita geotectonic arch, towards which we are heading. One option is to follow the waymarks along the track, but we prefer to take a path marked with a large milestone on your right (1 km; 12min) that ascends along the gorge of Feneros as soon as possible.
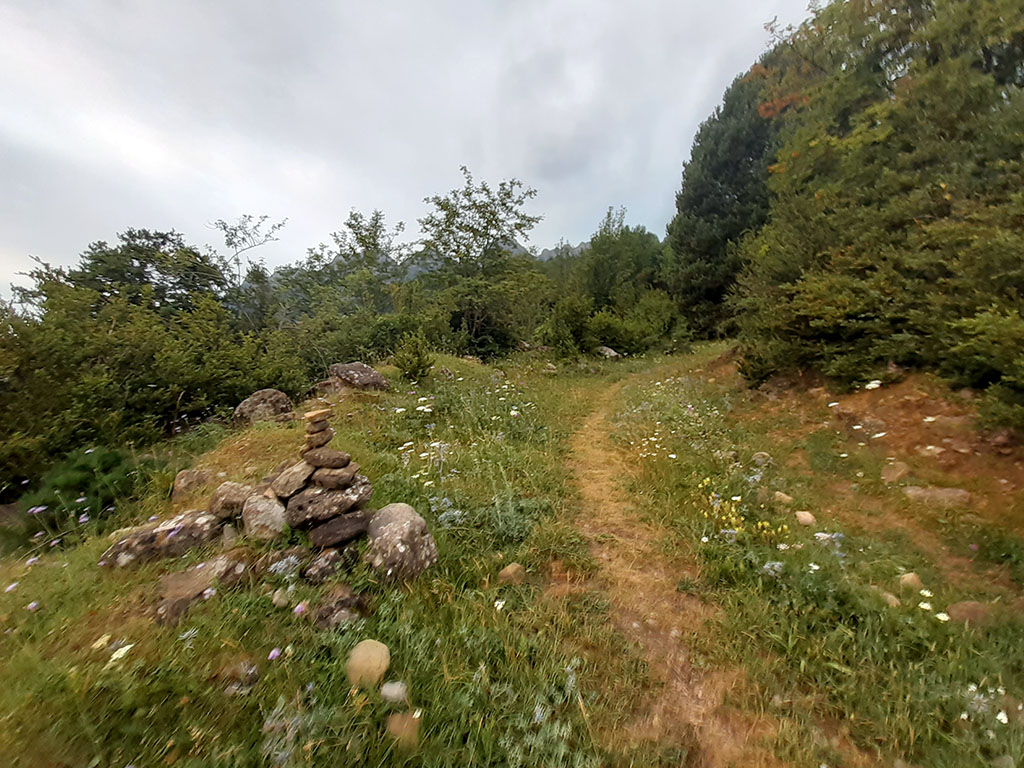
This is a well trodden path that zigzags upwards through the vegetation, with magnificent views towards Peña Blanca (Sierra de Tendeñera) and the Tena valley. Once in the meadow area, the path continues to the left with a view of Cochaldo Point. The path joins another, busier path that comes from the Ibón de Piedrafita just before arriving at a small...
(0h45min; 2,4kms) sign PR-HU 93.1(1.688m). To the left, towards Piedrafita, the path that we left half an hour before; straight on, the geotectonic arch of Piedrafita. We continue straight on towards the arch along a clear path, being careful to leave it if we are not going to visit the arch. Our recommendation is to lose 15 or 20 minutes and visit this marvel.
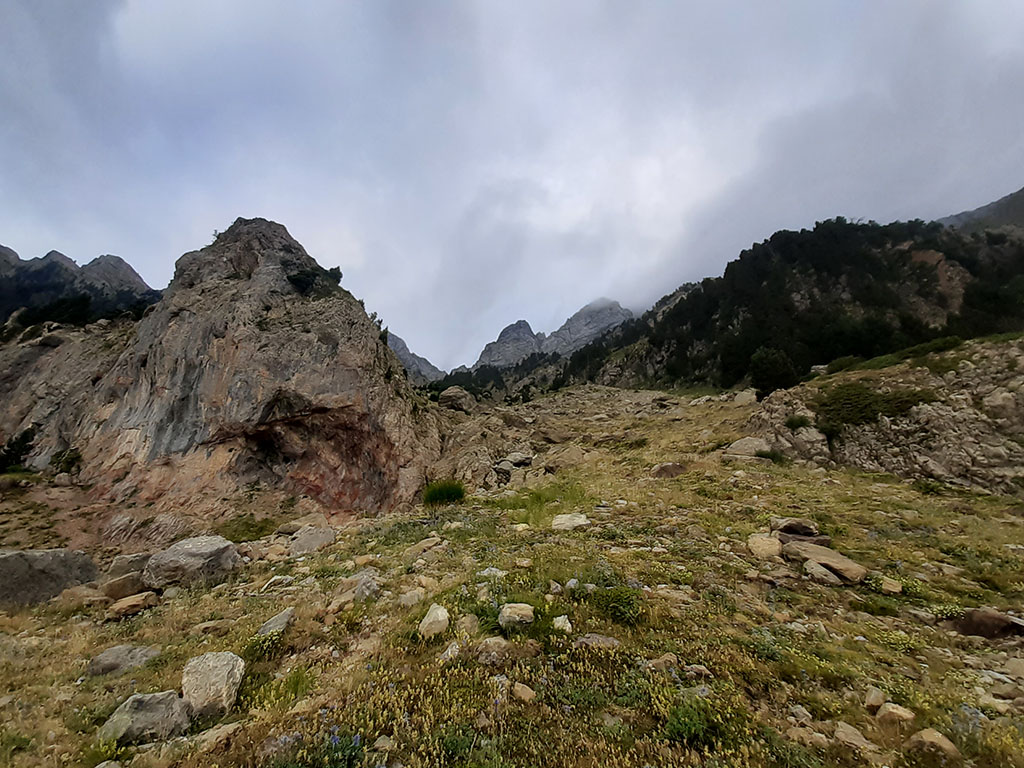
(1h05min; 3,0kms) Geotectonic arch of Piedrafita (1.877m).
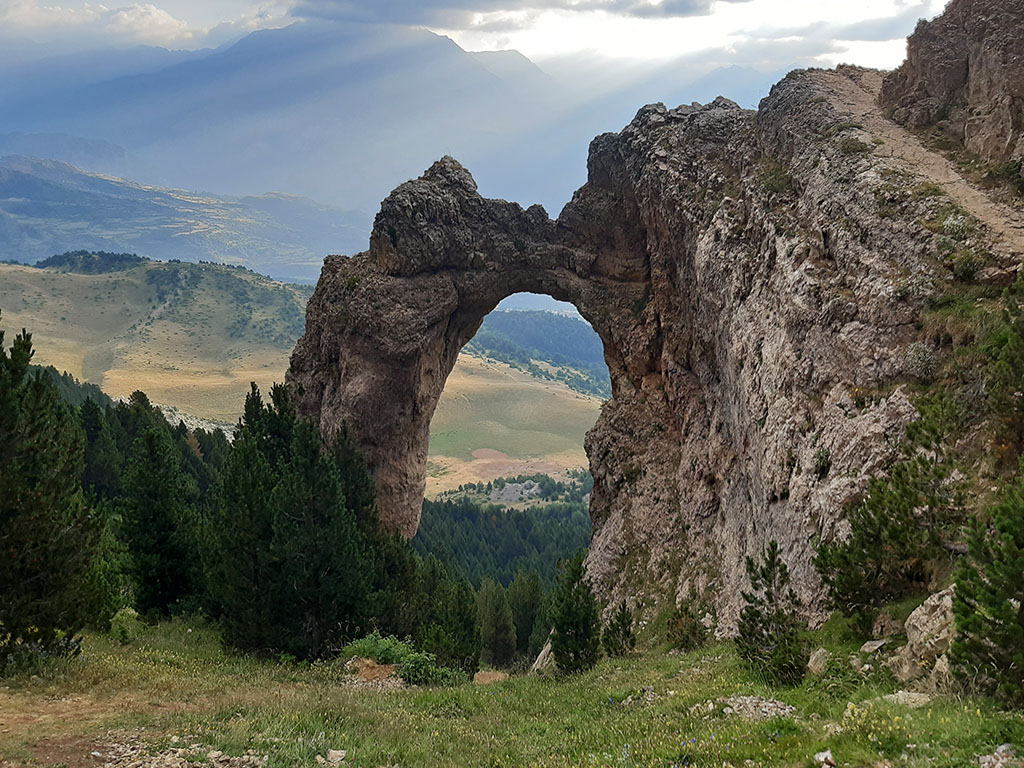
An exceptional place of incredible beauty. A geological whim for which it is difficult to give a quick explanation and a magnet for instagramers.
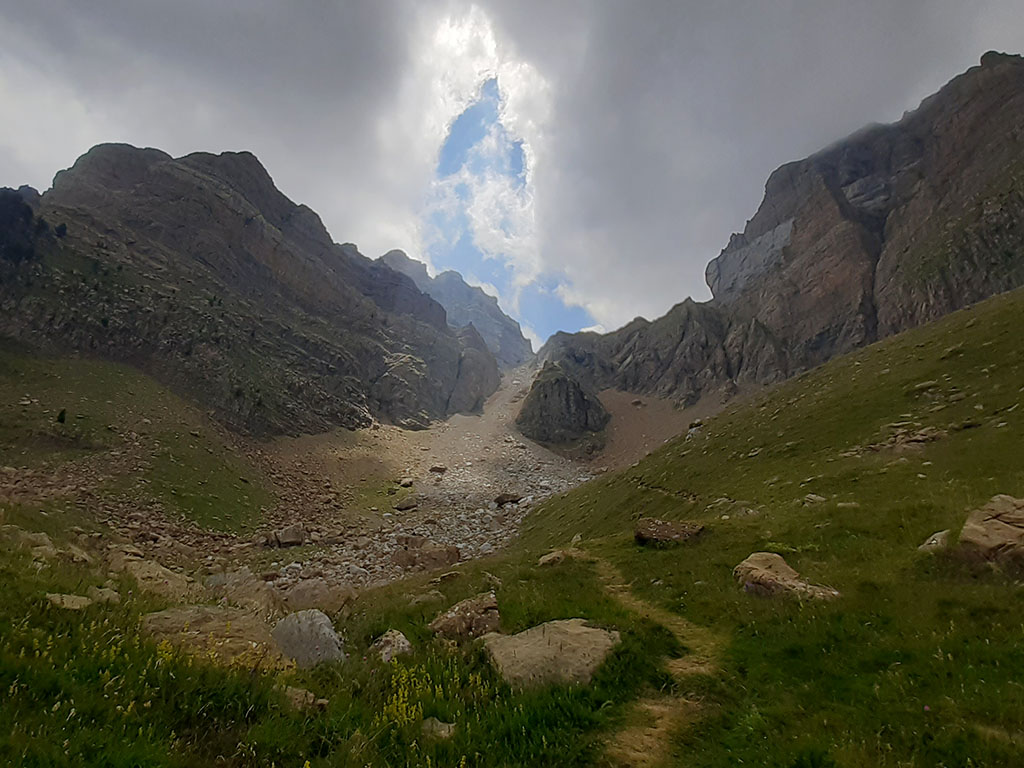
To return to our route up the Canal del Burro, we leave the arch path at the point where it turns to the left (SE). Practically without a path, or rather without it, we will start a horizontal traverse below the tree line, until we connect with the milestones that mark the ascent to the Canal del Burro. In 10 minutes we will be back on the ascent route, although the path, like the milestones, has disappeared.
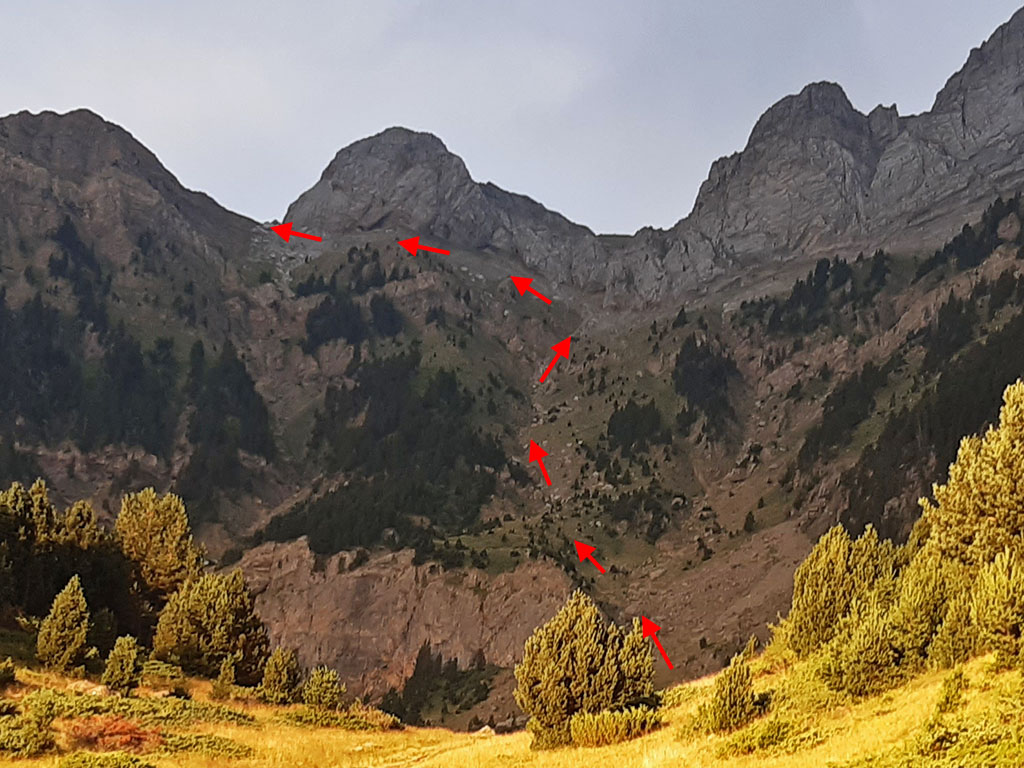
The best thing to do is to follow our intuition to progress along the wide corridor between Peña Blanca de Abajo and Peña Blanca Alta, until it is interrupted by an impassable wall. When you reach this point, or if you prefer, a little earlier, you will begin a traverse to the left, passing under the wall of Peña Blanca de Abajo, which will leave you in a few minutes at .....
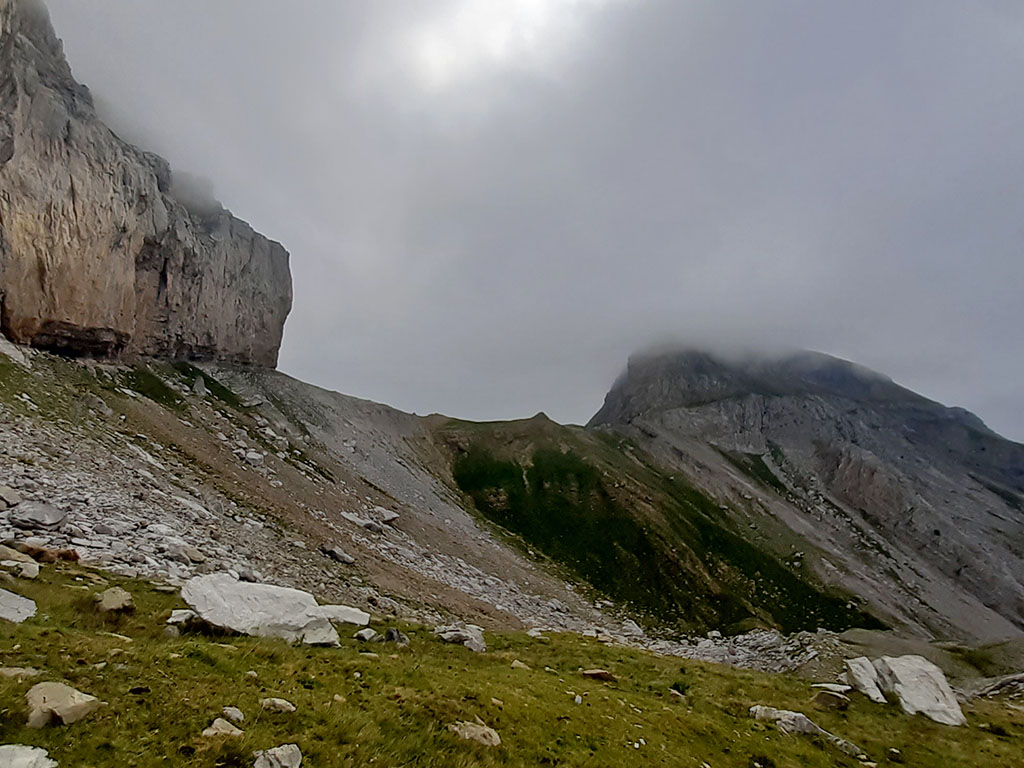
(2h10min; 4,4kms) col (2.250m). To the south, the views open out towards the Puerto ravine. To the east there is a small point and further on, Punta Cochaldo, which we will leave for another occasion. A timid path starts to skirt the southern slope of Peña Blanca de Abajo and then turns to the right to tackle the easy rocky ascent.
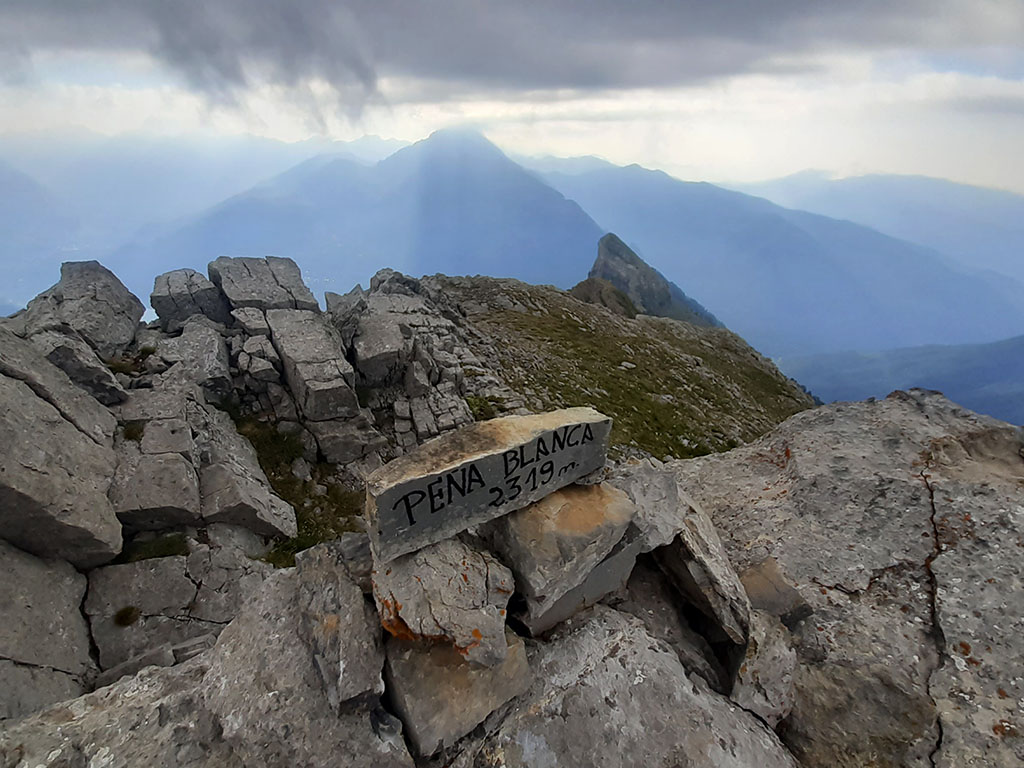
(2h20min; 4,6kms) Peña Blanca de Abajo / Punta Queba (2.319m).
The first of the day's peaks surprises us with a gentle descent to a pass occupied by small meadows and the occasional flock of sheep that spend the summer up here. The next peak is Peña Blanca, made up of four peaks of similar height. Seen from here, we can only see the first one, which is to the left of a gap where a gendarme stands out. We head towards the gap, on the left side of the gendarme, following some traces of the path as we please.
Once we have gained the gap, we continue for approximately 10 minutes along a wide ridge, between the lapiaz of the south face and the cliffs of the north face, until we reach the...
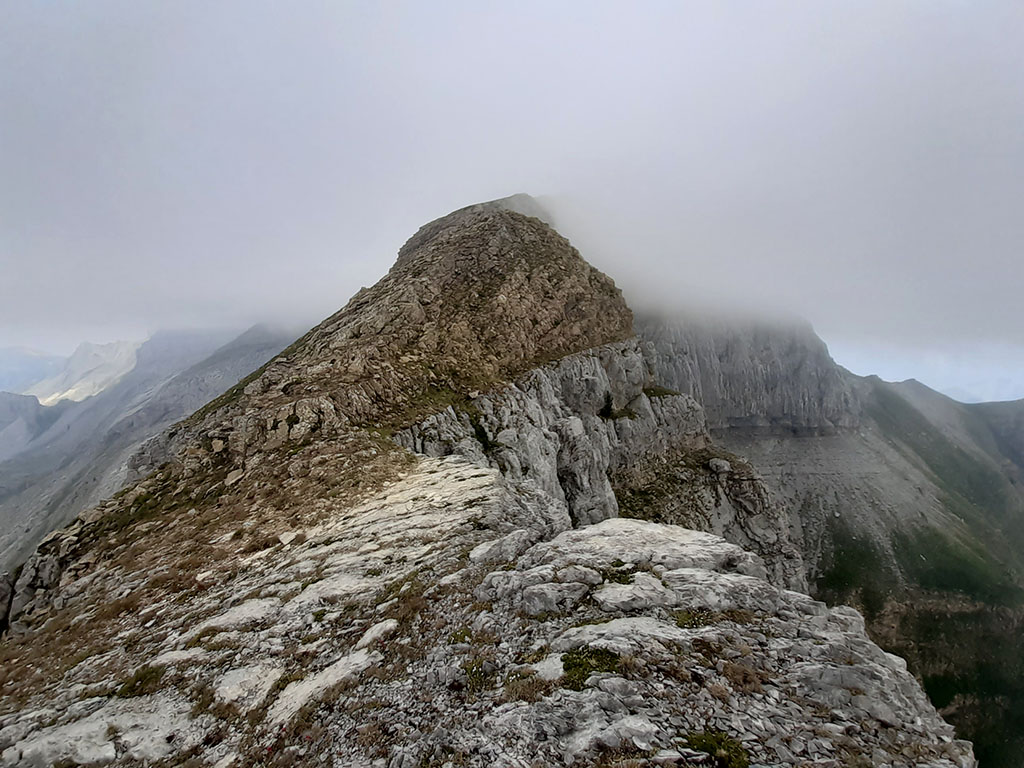
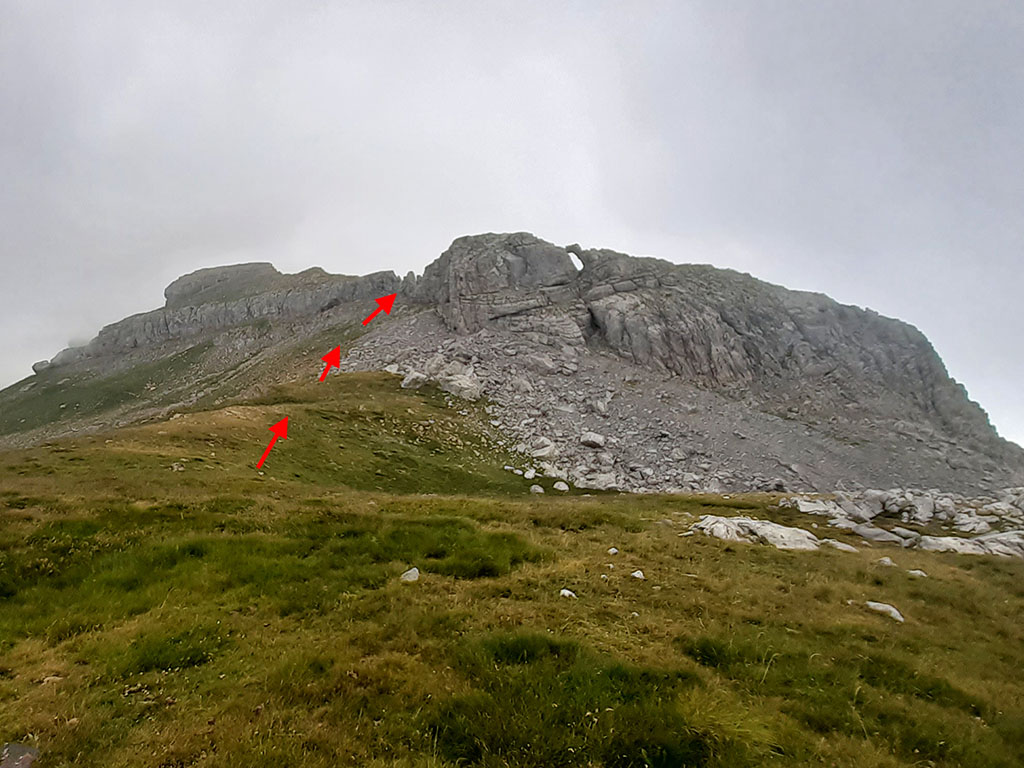
(2h55min; 5,5kms) Peña Blanca Alta (2.511m)where a painted stone marks the top.

The path becomes rough when we reach what appears erroneously on some maps as Corona del Mallo (located 200 metres below) and which is actually one of the peaks of Peña Blanca (second peak). The main summit (third peak) is the southernmost one, to which we turn off following a path that avoids the edge of the ridge (second peak) on the left hand side.

(3h05min; 5,7kms) Punta de Peña Blanca (2.536m). A large stone cairn marks the summit. Back on our route we continue ascending to the next summit (fourth peak), with nothing to identify it (3h10min).
The descent of Peña Blanca is the most confusing section of the route and the difficulty can vary between practically nothing and mediocre rock skills. To descend, we descend to the south, leaving a small spur to the right, along a mini corridor that leads to a wide sloping grassy area.
Continue descending in the same direction until you reach a channel of about 50 metres, but instead of entering it, descend to the right (west).
Looking for the best pass, we will climb up a small channel to a spur, where it connects with a path that we will follow to the right downhill and then along horizontal terrain.
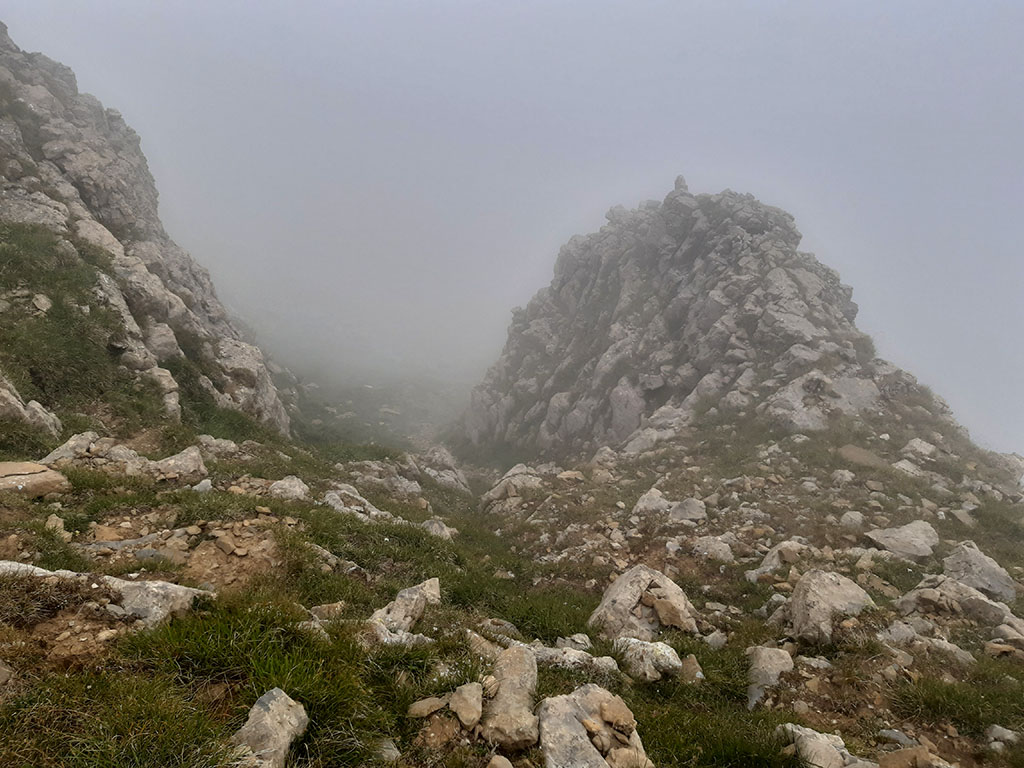
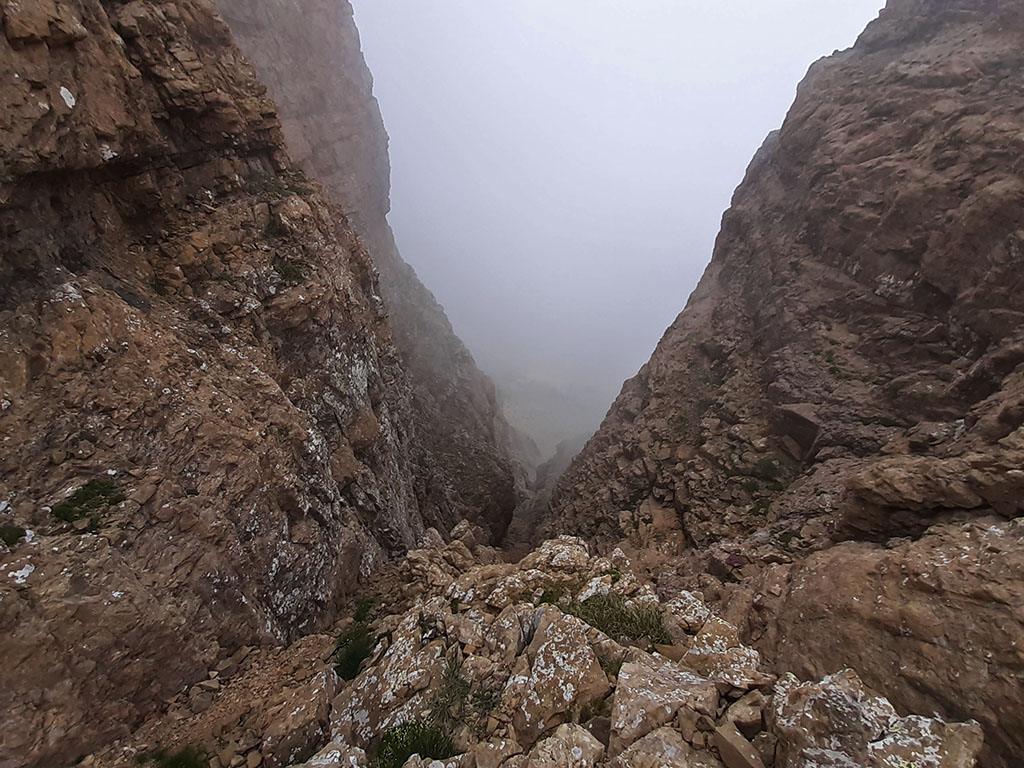
(3h45min; 6,1kms) Col of Covachirizas (2.357m). At this point we can start to retreat or continue with the second part of the route. To do so, we will walk along the wide pass towards the vast wall of Peña Parda.
To the right, the normal ascent to Peña Telera via the famous inclined traverse of Covachirizas; to the left, our circular alternative. We continue to the left, slightly downhill, until the wall loses its strength.
The start of the ascent is well marked with milestones, and begins with a turn where we can help ourselves with our hands.

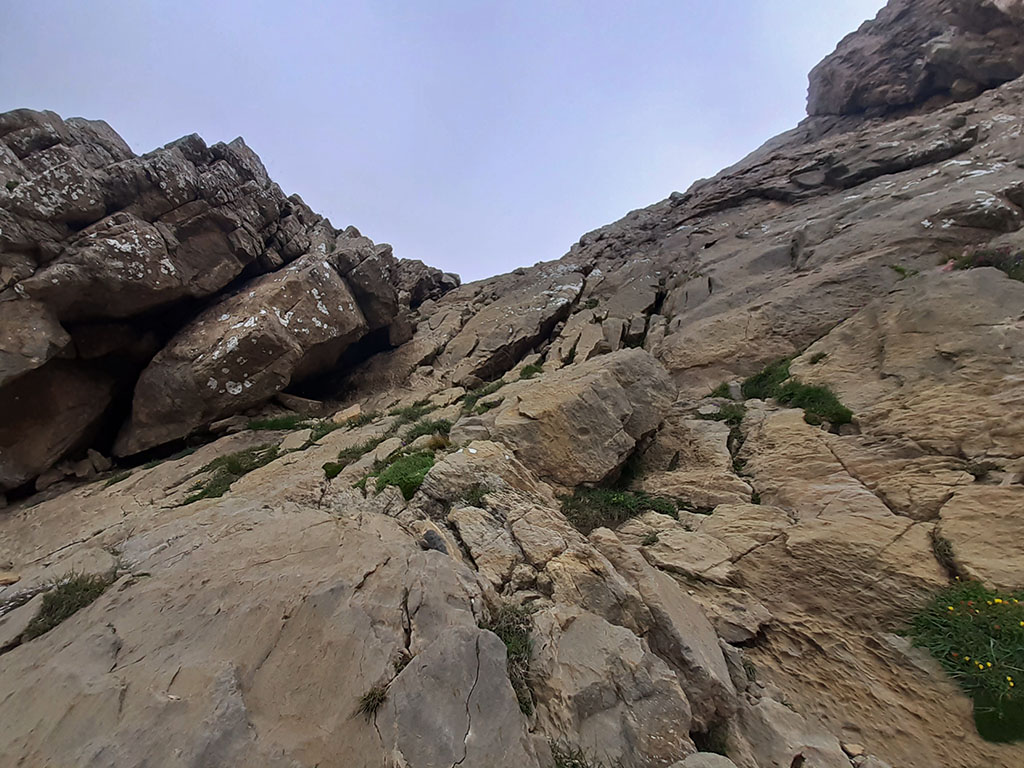
From here the path becomes diluted, and although you can see some milestones on either side, there is no path as such. As the terrain is not technically complicated, we can tackle it wherever we want, although the climb up through the scree is exhausting.
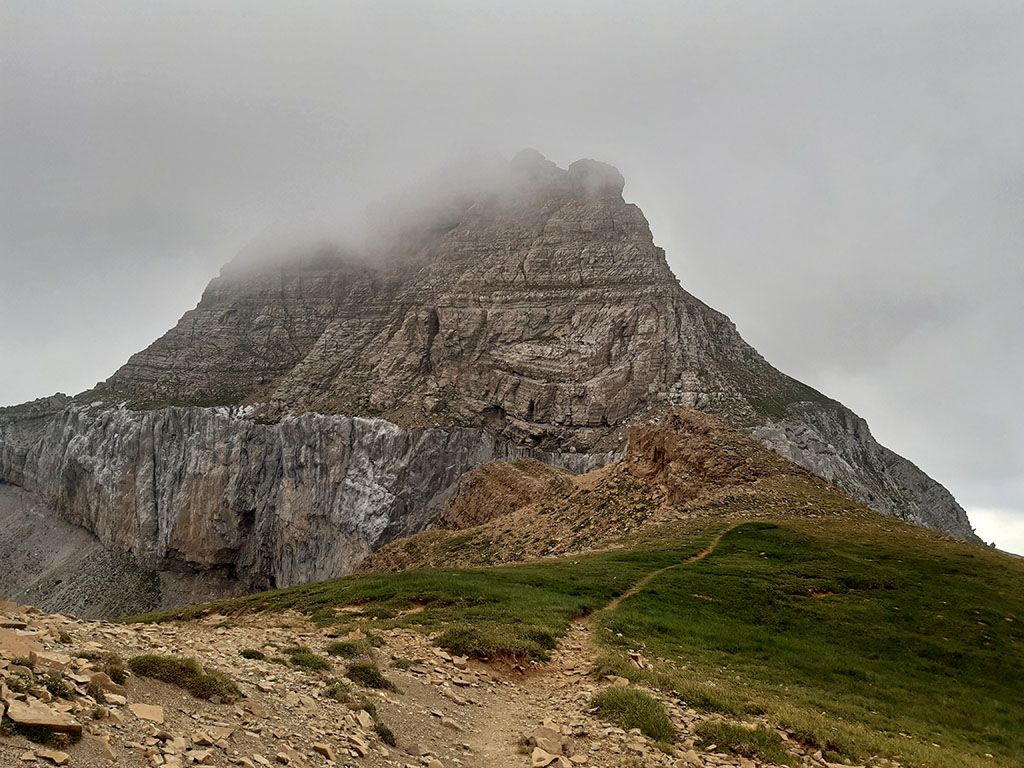
(5h00min; 7,9kms) Peña Parda / Covachirizas (2.661m).

After having reached this point on the southern slope and having climbed Peña Blanca, the path that reaches Peña Parda from the other side will seem like a motorway. We descend along it in a westerly and then northerly direction until we reach Cuello de Telera, where it forks. Here we choose to continue straight on, towards the ridge, following a path marked with red/pink dots that passes immediately to the right side of the ridge (East). The path climbs upwards for a few minutes until the ridge becomes less difficult and climbs upwards. The end of the climb is obvious and uncomplicated.
(5h35min; 8,7kms) Peña Telera (2.762m). A geodetic vertex marks the highest point (not the highest point of the mountain range, which is the highest point). Peña Retona).

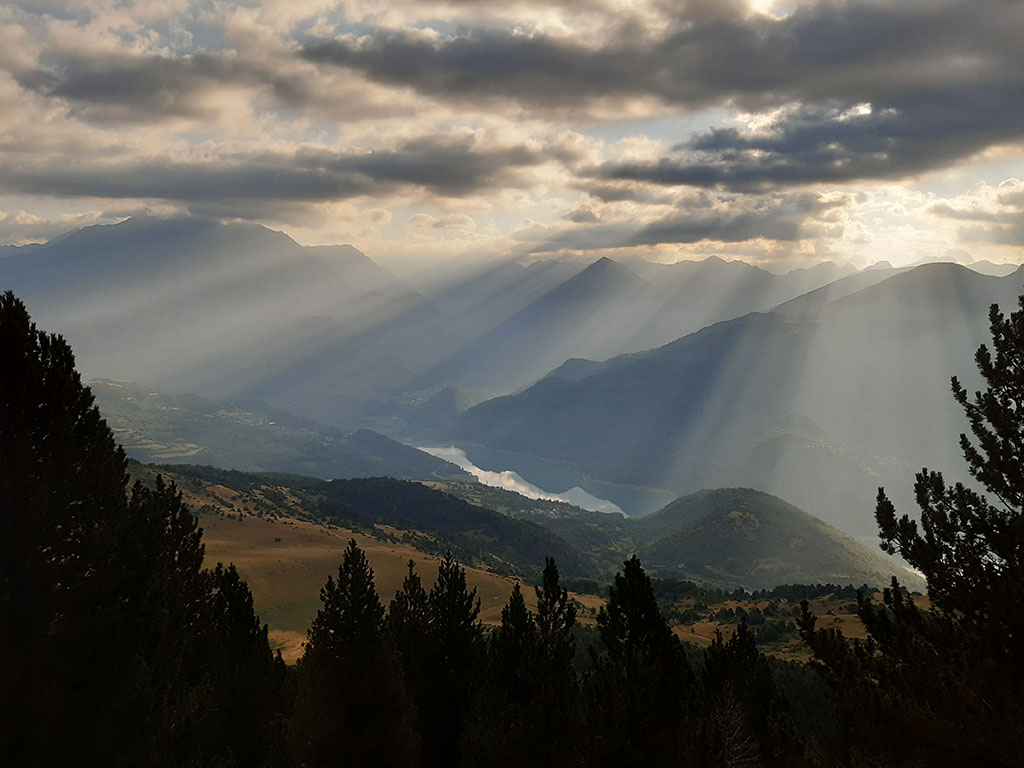
The views on a clear day must be splendid in all directions. We start descending in an easterly direction, close to the edge of the mountain range. We ignore a detour to the right (8min) that leads to Peña Parda and continue straight on, passing the exit of the famous Gran Diagonal corridor, an essential winter walk of medium difficulty (AD-AD+).
The path continues down to a kind of pass dominated on the right by a glacial cirque. The path descends to the left along some easy steps that in summer are neither difficult nor exposed.
Once you have passed the rocky section, the path turns right, where the famous exposed traverse of Covachirizas begins. In summer it is a small path with hardly any difficulty that you can walk at a good pace. The slope is not steep enough to cause vertigo in most people, but it is steep enough so that in the event of a fall, you will not be able to stop. In winter, things change and many people find this step more delicate than the Gran Diagonal itself.

Once again at the pass, where we join the ascent route, we advance to the Peña Blanca wall, where the route ends.
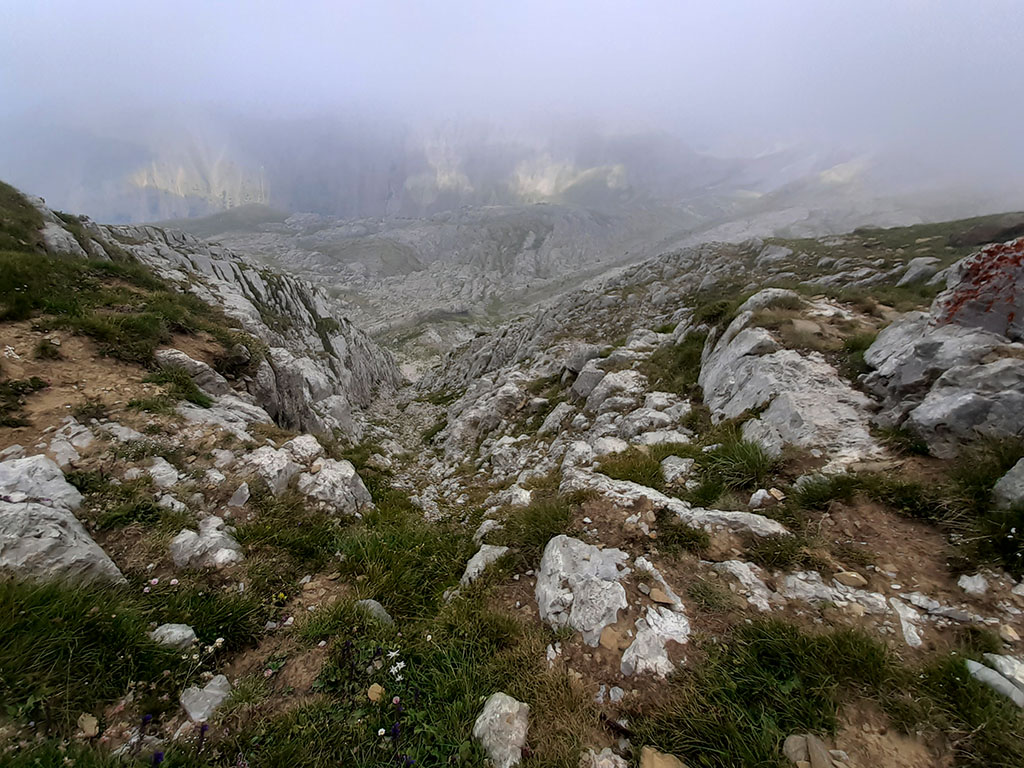
(6h30min; 10,1kms) canal of Covachirizas (2.377m). The descent of the channel is quick and relatively easy, considering the other options on the north face of Partacua.
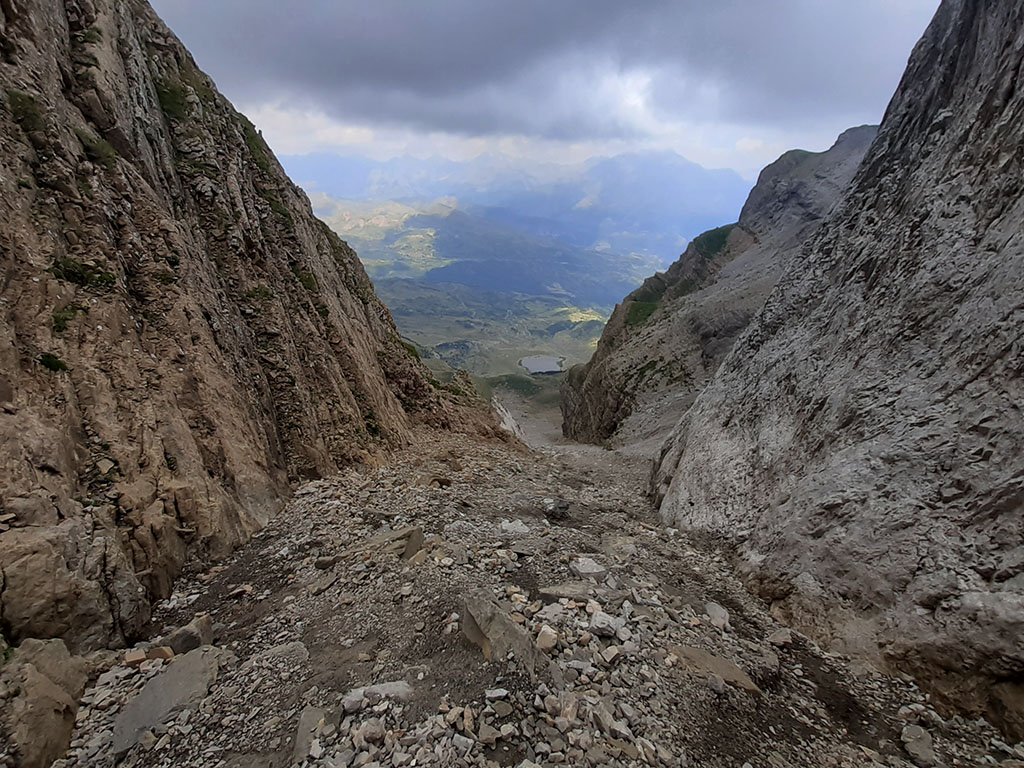
In just 30-35 minutes we reach the base of the corridor,
where the stones end and a path begins, along which we will continue at a good pace until we reach the...
(7h40min; 12,6kms) ibón de Piedrafita (1.615m).
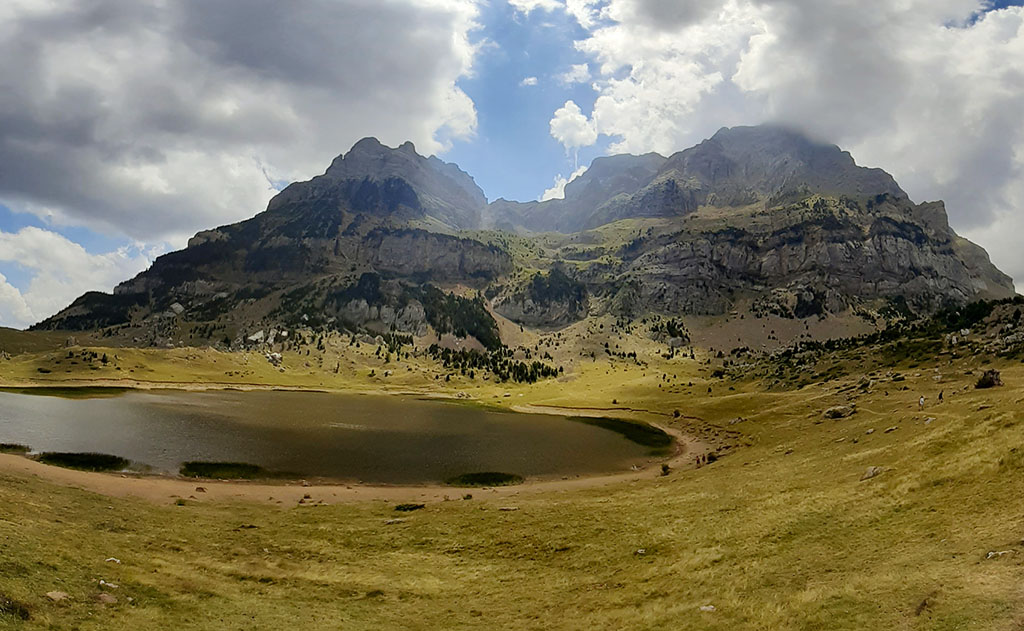
A good place to take a break before finishing this route. We go around the lake to the left (west) and continue along a well marked path next to the river, through the small boxwood ravine, through which the lake drains. The path leads to a track that leads to Lacuniacha (13.4kms). We can choose to follow the track or take the path that starts on the other side of the road and returns us to the track a little further down (14.2kms). We can still take another shortcut that avoids a horseshoe bend on the left hand side and another shortcut that avoids a bend on the right hand side. From here we do not take any more shortcuts and descend following the track in a southerly direction to the starting point of this excursion.
(8h25min; 15,7kms) Lacuniacha (1.350m).
NEARBY YOU MAY BE INTERESTED IN
Circular route, very long and very steep, to the westernmost peaks of the Sierra de Partacua.
(26,3kms; 2500m; 13 hours)